



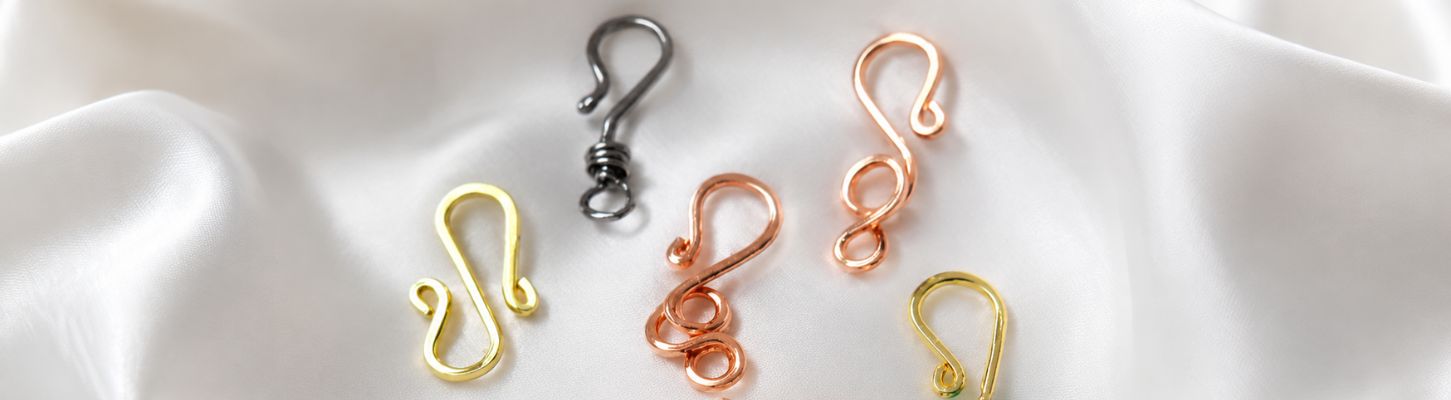
If you're ready to add a custom, professional finish to your handmade jewelry, the first thing you probably want to know is: how do you actually make clasps for jewelry? The good news is that it takes just a few minutes. Cut a short length of jewelry wire, shape one end into a small loop with round nose pliers, then bend it into a hook or "S" shape, add a matching eye, and gently hammer the metal so it holds firm. Because you're working with simple wire and a few basic pliers, you skip the need for a big workshop or costly equipment, so you can create a strong, wearable closure far more easily than you'd expect.
In this guide, we'll walk you through what a clasp does, the exact tools and wire you need, how to make a hook-and-eye necklace clasp step by step, and how to shape S-hooks that close neatly every time. So let's dive deeper into the details.
Explore Our Categories


Table of contents
What Is a Jewelry Clasp?
A clasp is the fastening that connects both ends of a bracelet or necklace so it stays secured when worn. Common styles include hook clasps, lobster clasps, magnetic clasps, toggles, and box clasps. The two styles you can make most easily with wire are the hook-and-eye clasp and the S-hook. Both are strong, simple, and beginner-friendly.
Tools and Materials You'll Need
You likely already have most of these:
-
Jewelry wire, around 1mm (about 18 gauge) for a sturdy clasp, or 16 gauge for a heavier look
-
Round nose pliers
-
Long nose (chain nose) pliers
-
Flush wire cutters
-
A small file
-
A chasing hammer and a steel bench block
-
A rawhide or nylon mallet (optional, for hardening)
If you would rather start from a kit, our hook clasps and jump rings pair nicely with anything you make by hand.
How to Make a Necklace Clasp (Hook and Eye)
This is the classic two-part closure. One half is a hook, and the other half is a small loop, or eye, that the hook catches. Here is how to make a necklace clasp step by step.
Make the hook:
-
Cut about 2 inches of wire. File the cut end so it is smooth.
-
Take your round-nose pliers and curl a tiny loop at one of the wire ends. This loop connects the clasp to your chain.
-
Hold the wire about a half inch past the loop and bend it back on itself to form a U-shaped hook.
-
Curl the very tip outward a little so the hook is easy to use and does not snag.
-
Trim any excess, file the end, and gently hammer the curved part on your bench block. This work-hardens the metal so the hook keeps its shape.
Make the eye:
-
Cut another inch of wire and file the end.
-
Roll one end into a small loop for attaching to the chain.
-
Shape the remaining wire into a wider, rounded loop, sized so the hook can slide through easily.
-
Wrap or tuck the tail, trim, file, and tap it lightly with the hammer to finish.
That is a complete, wearable clasp. Knowing how to make a necklace clasp like this lets you size each closure to match your design's weight.
How to Make S Hooks (the S-Clasp)
An S-hook, sometimes called an S-clasp, is a single piece of wire bent into the shape of the letter "S." It works for both necklaces and bracelets and is one of the fastest closures to make.
-
Cut a piece of wire about 3 inches long, roughly three times the size of your finished clasp.
-
Using round-nose pliers, twist a compact coil onto both ends of the wire. Set the two coils so they curve away from each other in opposite directions.
-
Place one end against a round mandrel, a thick marker, or the wide part of your pliers, and bend the wire into a smooth curve.
-
Repeat on the other end in the opposite direction so the wire forms an "S."
-
Lightly hammer the curves on your bench block to flatten and strengthen them, then reshape if needed.
This is all there is to learning how to make S hooks. Make a small batch while your tools are out so you always have one on hand.
How to Close an S Hook
If you are wondering how to close an S hook, it is simple. One loop of the "S" stays permanently attached to your jewelry or a jump ring. With chain-nose pliers, lightly press the loop shut so nothing can work its way loose. Leave the other loop slightly open, just wide enough to hook onto the matching ring or chain end when you put the piece on. Aim for a hold that feels firm yet still opens and closes without a fight.
Tips for Strong, Professional Clasps
-
Always file cut ends so they feel smooth.
-
Hammer lightly. Too much and the wire can thin and weaken.
-
Work-harden curves with a few taps so the clasp keeps its shape.
-
Size the opening carefully so jewelry stays on but comes off easily.
-
For a softer hardening pass that will not change the shape, use a rawhide mallet.
When to Use Ready-Made Clasps
Handmade clasps add a personal touch, but ready-made findings save time on larger batches or when you want a uniform look. Browse Atlanta Findings Company's full range of magnetic, lobster, box, and hook clasps to mix and match with your own work.
Final Takeaway
Making your own clasps is one of the simplest ways to give handmade jewelry a custom, finished feel. With a bit of wire and a few basic pliers, a hook-and-eye or S-clasp comes together in minutes and gets easier every time. Remember to file your ends, harden your curves, and size the opening so pieces stay secure but slip on easily. When you're ready to build out your toolkit, explore our full range of clasps and findings, or reach out to our specialists for a recommendation.
Have questions? Reach our specialists at info@Atlantabeadcompany.com or by phone at +1 888-234-1234, and browse our blog for more detailed information about findings.
Frequently Asked Questions
What is an S-hook Clasp?
It is a closure shaped like the letter "S" that hooks onto a ring or chain end on each side.
Which Clasp is Easiest to Make?
The S-hook is a single piece of bent wire.
How Do I Attach a Handmade Clasp?
Connect it to your chain directly or through a jump ring, then close the connecting loop firmly.


