



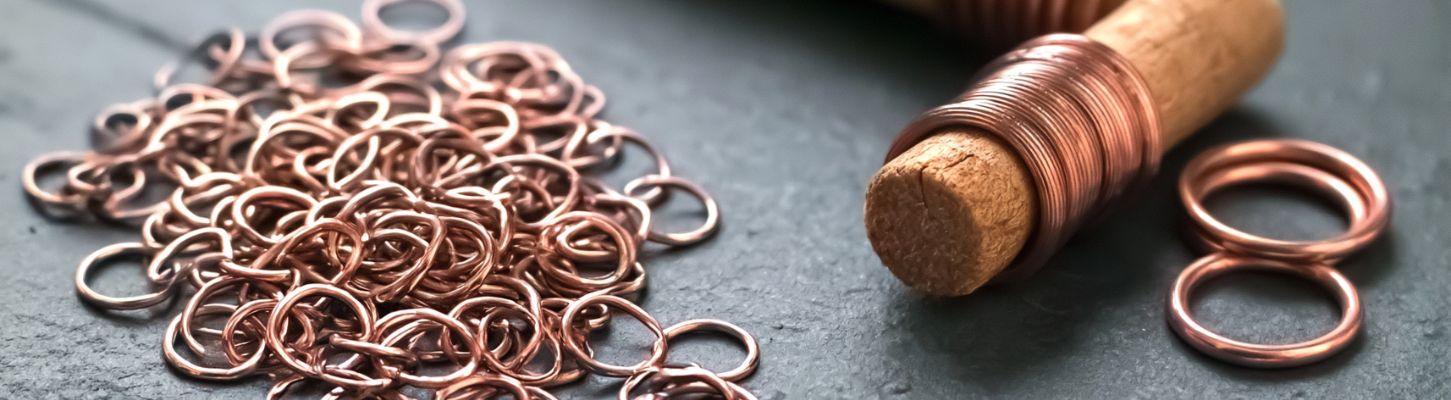
If you're ready to make your own jump rings to gain more control over your jewelry projects, the first thing you probably want to know is: how do you actually make one that closes cleanly?
You can make a jump ring by wrapping jewelry wire tightly around a round mandrel to form a coil, sliding it off, and cutting straight across each loop with flush cutters to create individual rings. After cutting, use two pairs of pliers to twist the ends together until they meet without leaving a gap. Since you're shaping each ring yourself from the wire and mandrel of your choice, you get full control over the size, metal, and finish of every ring, something premade findings simply can't offer. At Atlanta Findings Company, we work with makers every day, so we understand how the right jump ring can help bring an entire jewelry design together.In this guide, we'll walk you through what a jump ring is and why making your own is worth it, the exact tools and wire you'll need, how to coil and cut clean rings step by step, a no-special-cutters method for beginners, how to close rings so they hold, and how to put them to work in clasps, charms, and earrings. So let's dive deeper into the details.
Explore Our Categories


Table of contents
What Is a Jump Ring?
A jump ring is a small ring of wire used to connect parts of a piece of jewelry. You will find them linking clasps to chains, attaching charms to bracelets, and holding earring components together. They are tiny, but they do a lot of the structural work in a finished design.
There are two main types you should know before you start:
|
Type |
What it is |
Best for |
|
Open jump ring |
Has a small gap where the two cut ends meet |
Connecting components you may want to attach or adjust later |
|
Closed jump ring |
A soldered or fully joined ring with no gap |
Permanent links and spots that carry more stress |
When you make your own rings by coiling and cutting, you are creating open jump rings. You then close them by hand so the ends meet. If you want a permanent join, you can solder the seam, or keep a few soldered-closed jump rings on hand from our jump rings collection. That said, most everyday jewelry holds up fine with a well-closed open ring.
You can also explore ready-made options anytime in our jump rings collection if you would rather keep a few sizes on hand alongside the ones you make.
Why Make Your Own Jump Rings?
Buying rings is quick and easy, so why bother making them? A few reasons make it worthwhile, especially as your projects get more personal.
First, control over size: Premade rings come in set diameters. When you make your own, you pick the exact inside diameter your design calls for by changing the mandrel you wrap around.
Second, matching your metal: If you are working with a specific copper, brass, or plated wire, making your rings from that same wire keeps the color and finish consistent across the whole piece.
Third, value. A spool of wire makes a lot of rings. If you go through jump rings for jewelry making on a regular basis, coiling your own can stretch your supplies further.
Fourth, availability: If you run out of one size at the wrong moment, you can make exactly what you need instead of pausing the project.
That said, making your own is a skill that takes a little practice. Many makers do both: they keep a stock of premade rings for speed and make custom sizes when a design needs something specific.
Tools and Materials You Will Need
You do not need much to get started, and most of these are tools you will use across many jewelry projects.
-
Jewelry wire in your chosen metal and gauge (we will cover how to choose this next)
-
A round mandrel sized to the inside diameter you want. A metal mandrel, a knitting needle, or even a sturdy dowel works well.
-
Flush cutters for clean, square cuts. Basic wire cutters can work too, and we will show you how
-
Two pairs of pliers, such as flat nose and chain nose, for opening and closing rings without marking them
-
A needle file (optional) to smooth cut ends if you are not using flush cutters
If you need to restock your basics, browse our full range of findings and jewelry supplies to round out your kit.
How to Choose the Right Wire
The wire you pick shapes how your rings look and how well they hold. Three things matter most: gauge, hardness, and metal.
Gauge is the thickness of the wire. In the United States, jewelry wire is usually measured on the American Wire Gauge system, where a higher number means a thinner wire. You can read the technical background on the American Wire Gauge standard from the National Institute of Standards and Technology. For jump rings, makers often work somewhere in the 16- to 22-gauge range. Heavier gauges like 16 or 18 give you sturdy rings for clasps and chain. Lighter gauges like 20 or 22 suit delicate links and small earring connections.
Hardness describes how stiff the wire is. Half-hard wire tends to hold its shape and close cleanly, which makes it a comfortable choice for rings. Dead-soft wire is easier to coil but may need a little extra work to firm up before it holds well.
Metal is your call based on the look you want. Copper is affordable and great for practice. Brass, plated wire, and precious metals each bring their own color and feel. Whatever you choose, try to match it to the other findings in your piece for a consistent finish.
A simple rule: balance the gauge of your rings against the chain and components they connect to. A ring that is far thinner than the chain it joins can look mismatched and may not hold as securely.
How to Make Jump Rings Step by Step
Here is the core method. These steps cover how to make jump rings of any size, since the technique stays the same no matter which mandrel and gauge you use.
Step 1: Measure and Cut Your Wire
Cut a length of wire to coil. A length of around 12 to 13 inches is a manageable starting amount and will give you a small batch of rings to practice with.
Step 2: Coil the Wire Around the Mandrel
Hold one end of the wire against your mandrel and wrap it tightly, keeping each loop snug against the last. Tight, even coils with no gaps give you the most usable rings and the least wasted wire. If you have nylon-jaw pliers, they help you press the ends in neatly without scratching the wire.
Step 3: Slide the Coil Off
Gently slide the finished coil off the mandrel. You should now have a neat spring of wire loops, each one a future jump ring.
Step 4: Make Your First Cut
Use your thumbnail to separate the first loop slightly from the coil so you have room for your cutters. Position your flush cutters straight across the wire, perpendicular to it, so you get a square cut. Trim the end.
Step 5: Complete the Ring
Line the flat side of your cutters up with that first cut and make your second cut to free the ring. Cutting both ends square is the secret to a ring that closes without a visible gap. This is the heart of how to cut jump rings cleanly.
Step 6: Repeat
Work your way down the coil, separating and cutting one ring at a time, until you have cut them all. With a little rhythm, this goes quickly, and you will have a small pile of open rings ready to use.
No Flush Cutters? Try the File Method
You can still make tidy rings without investing in flush cutters. Basic wire cutters leave a slightly pointed, chisel-shaped tip, so the fix is simply to smooth those ends with a file.
Coil and cut your rings as usual. Before making the second cut on each ring, gently file the first cut end flat, keeping the file square to the wire. Then cut the ring free, leaving it a touch longer than usual so you have a little material to remove. Finally, file the second cut end flat as well.
Rings finished this way are not quite as flawless as flush-cut rings, but they close neatly and are perfectly good for handmade jewelry. It is a great way to get started before buying more specialized tools.
How to Close Jump Rings Properly
A poorly closed ring is the most common weak point in handmade jewelry, so this step is worth doing well.
Step 1: Grip Both Sides
Hold the ring with a pair of pliers in each hand, one on either side of the opening. Hold firmly, but gently, so you do not leave marks on the metal.
Step 2: Work the Ends Past Each Other
Instead of pulling the ring open sideways, twist one end toward you and the other away, moving the ends past each other in opposite directions. Push them slightly past the closing point a few times. This little back-and-forth firms up the metal and builds tension that helps the ring stay shut.
Step 3: Bring the Ends Together
Line the two cut ends up so they butt against each other with no gap. If your ends were cut square and you firmed up the ring, they should meet cleanly and stay put. Run a fingertip over the seam to check that it feels smooth.
How to Use Jump Rings for Jewelry
Once you can make and close rings, you can use them all over your designs. Knowing how to use jump rings for jewelry opens up a lot of possibilities.
Attaching clasps. Use a jump ring to connect a clasp to the end of a chain or beaded strand. This is one of the most common finishing steps in necklaces and bracelets. Pair your rings with a clasp from our clasps and hooks selection for a clean finish.
Adding charms and pendants. Slip an open ring through a charm's loop and the chain, then close it. Charms become easy to add, swap, or rearrange.
Making earrings. Jump rings link ear wires to dangles and connect stacked components. Reach for our ear wire collection when you assemble a pair.
Building and extending the chain. Linking rings together lets you lengthen a chain or create simple chain-style designs from scratch.
To attach two components, open a ring with the same twisting motion you use to close it, thread on both pieces, and close it back up. Always open and close by twisting the ends past each other rather than pulling them straight apart, which can distort the round shape.
Pro Tips and Common Mistakes to Avoid
A few habits will raise the quality of every ring you make.
-
Keep your cuts square. Angled cuts leave gaps. Take the extra second to line up your cutters straight across the wire.
-
Do not pull rings open sideways. It warps the shape, and the ends never sit right again. Twist instead.
-
Match your gauge to the job. Thin rings on a heavy chain can pull open. Pick a gauge that suits the weight of the piece.
-
Protect the surface. Grip gently and consider nylon-jaw pliers for soft or plated wire to avoid marks.
-
Make a few extras. Rings are small and easy to lose, so coil a couple more than you think you need.
If you would rather skip the coiling on busy days, you can always keep a supply from our jump rings collection ready to go.
Conclusion
You now have everything you need to make clean, reliable jump rings from scratch: how to choose your wire, coil, and cut square, close with proper tension, and put your rings to work in clasps, charms, earrings, and chain. The first few may not be perfect, and that's completely normal; a square cut and a firm twist are habits that come fast with practice. Coil a small batch today, and within a project or two, it will feel like second nature.
Ready to build out your kit? Explore our jump rings collection for ready-made sizes to keep on hand, plus the rest of our findings and supplies.
Have questions? Reach our specialists at info@Atlantabeadcompany.com or by phone at +1 888-234-1234, and browse our blog for more detailed information about findings.
Frequently Asked Questions
What Gauge Wire is Best for Jump Rings?
It depends on the project. Many makers use 16 to 18 gauge for sturdy rings that hold clasps and chain, and 20 to 22 gauge for lighter, more delicate connections. Match the ring to the weight of the components it joins.
What Can I Use as a Mandrel?
Anything round and rigid to the diameter you want. Metal mandrels, knitting needles, drill bits, and sturdy dowels all work. The mandrel's diameter sets the inside diameter of your rings.
Why Won't My Jump Rings Close Without a Gap?
The most common cause is cut ends that are not square. Cutting both ends flat with flush cutters or filing them flat lets the ends meet cleanly. Firming up the ring by twisting the ends past each other also helps.
Do I Have to Solder Jump Rings Closed?
No. A well-closed open ring holds up fine for most everyday jewelry. Soldering creates a permanent joint and is worth it for high-stress spots or pieces where you want extra security.
Can I Make Jump Rings Without Flush Cutters?
Yes. Use basic wire cutters and a needle file to flatten the cut ends. The rings come out a little less perfect than flush-cut ones, but are still strong and tidy.
How Many Jump Rings Can I Get From a Coil?
It varies with your wire length and mandrel size, but a roughly 12 to 13-inch length of wire wrapped on a small mandrel yields about a dozen rings. Longer wires and smaller diameters give you more.


